
- Joined
- Mar 31, 2009
- Messages
- 56
I put this tutorial on arena a while back and I thought I should put it here in case not everybody here goes there.
There is a new mold making photo tutorial and a few new petites for sale on my webpage (which has moved)
http://www.thelostlotus.com
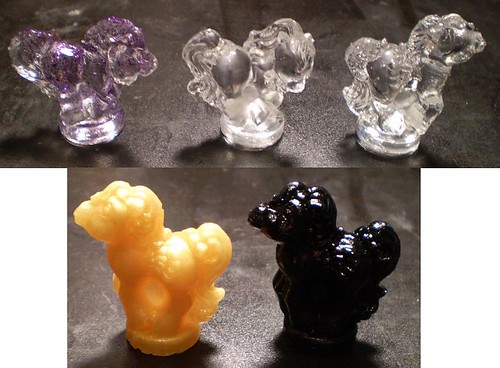
Soo.. I started playing with resin and I decided that I should make petite ponies with it. Heres a picture of a real petite (on top) and two I cast and painted.
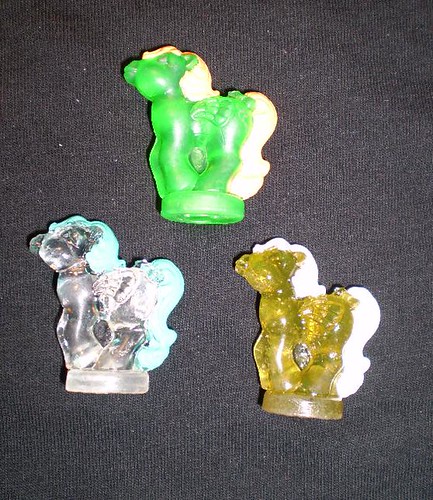
Heres a couple more shots.
To make them you will need:
-A solid petite pony
-disposable plastic cups
-craft sticks (for stirring)
-double sticky tape
-smooth on 20 a mold rubber stuff
>>ReoFlex® - 'Next Generation' Urethane Rubber | Smooth-On, Inc.
-castin' craft resin and catalyst (available at michaels and art stores)
-spray mold release (also at art stones)
!!!!!!!!!!!!!!!!!!!!!!!!!!!!!!The resin is very toxic BTW, read better instructions than these before u use it, ppl have even suggested respirators to avoid breathing the fumes, also doctors gloves r nice to just wear all the time, the resin comes off nothing.
-So, You take a cup you dont care about and put a piece of double stick tape at the bottom of the inside and then stick ur petite firmly down in the cup.
-spray the pony and inside of cup with mold release, let it dry
-mix the two part rubber mix thouroghly and pour over pony until shes covered at least by an 1/8"
-wait like a day
-wrestle the pony out. aided by heating the mold by putting it under the lamp
-spray a little more mold release in ur new pony mold, let it dry
-get ur resin, u can add glitter or anything without water in it, there r special dyes.. ive used even powdered charcoal to get black!
-add enough catalyst... im still not sure how much enough is, any where from 5 to 9 drops maybe?
-mix thouroghly, try to avoid bubbles
-pour in the mold.. any place where a toe or nose it under cut there will be a bubble, proper holding of the mold, ie sideways, nearly upside down 'can' get the bubbles out, but its the biggest problem with this project and some poses are especially almost impossible to cast properly.
-put the completely filled mold under a lamp or something and let it dry. at least 3 or 4 hours? until its hard i guess. if u touch it too soon u will leave a finger print. sometimes it will be dry but still sticky to the touch is some part of the process wasn't perfect... resin is kinda complicated, a good book to start with that i own is
here
Now, try to get the pony out, again easier if the mold is warm. And now u have a petite pony.
Big BTW, the resin smells absolutely horrible and is pretty toxic, and the materials u need cost $60+++ in all. You can of course have me make ur ponies for u, just send me a PM")
They can be:
-clear/tranlucent
-opaque
-glittery
-glow in the dark
-TE/princess (gem stick in em somewhere)
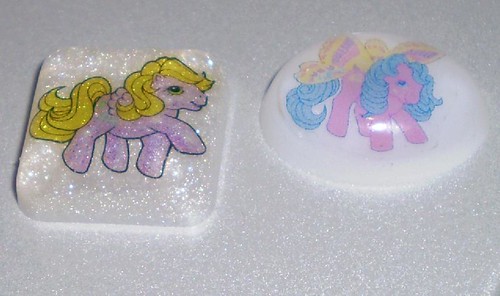
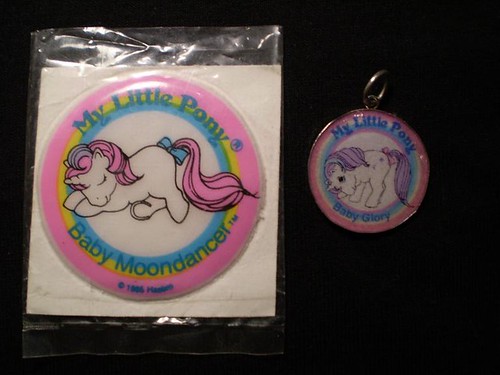
I also have been making little charms out of the resin with pony pictures inside!
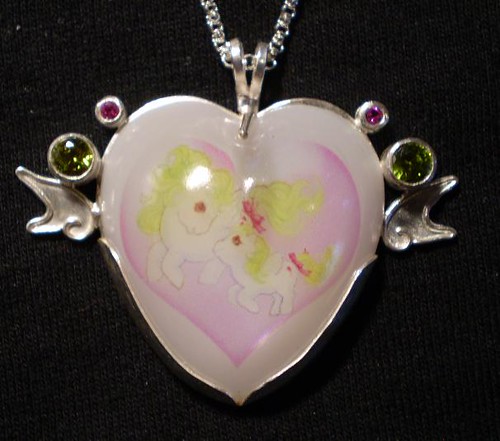
And I made sterling settings for them to ppl can have grown up pony jewelry!
There r definitely simpler ways to may such charms wearable, drilling a hold and buying some findings and stuff would make this project doable for ppl that have no experience metal smithing. the book i linked earlier has lots of projects that look pretty cool that aren't too complicated.
To make such a pony charm u need:
-resin and catalyst
-mold release
-store bought mold
-opaque white dye
-find ur favorite image on ur computer and print it small on clear sheets like for scrap booking, or overhead projectors
so:
-spray the mold w release
-mix up some resin and catalyst and fill the mold like half way
-stick under a heat lamp and allow it to dry like 15 mins
-cut out ur image carefully, mix up some resin and catalyst and put a few drops into the mold and lay ur picture on top, this helps keep air bubbles from getting under the picture then allow to dry some 15 mins again.
-now mix some opaque white w the resin and catalyze and pour no more than 1/8" on top of the stuff uv poured already-
-allow to dry under a lamp, it should pop right out when its done
a variation of this is a totally clear charm like in this necklace
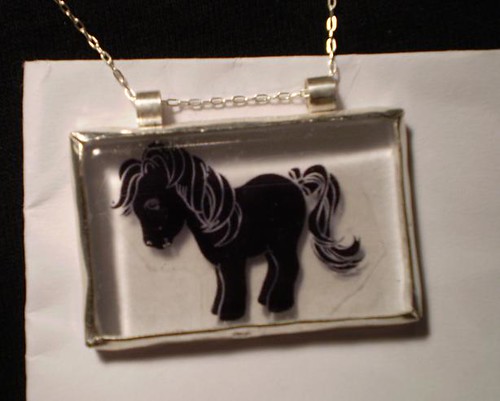
oh, and all the charms need a bit of sanding usually, mostly on the backs.
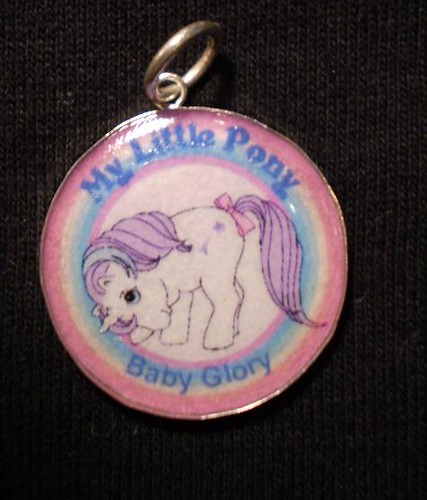
Another project w less steps requires something to use as a base or bezel, i think u can buy such things at craft stores.
for this you need:
-some kind of bezel (mines made of sterling)
-resin and catalyst
-image printed out
-spray sealant
-glue
So, cut out the picture and seal it all over with the spray sealant and glue it to the bezel how you want it. they mix up a tiny bit of resin w lots of catalyst 8-15 drops, and fill up the tiny space on top of the picture, and let it dry under a lamp.
The one i did is actually very small, like 2cm across
So... ya. If anyone wants to actually try this stuff feel free to ask me any questions. If you wanna help fund my art addiction by buying some of the stuff I've made or custom order some jewelry or petites, please PM me!
Thanks for reading all the way to the end!
absol
There is a new mold making photo tutorial and a few new petites for sale on my webpage (which has moved)
http://www.thelostlotus.com
Soo.. I started playing with resin and I decided that I should make petite ponies with it. Heres a picture of a real petite (on top) and two I cast and painted.
Heres a couple more shots.
To make them you will need:
-A solid petite pony
-disposable plastic cups
-craft sticks (for stirring)
-double sticky tape
-smooth on 20 a mold rubber stuff
>>ReoFlex® - 'Next Generation' Urethane Rubber | Smooth-On, Inc.
-castin' craft resin and catalyst (available at michaels and art stores)
-spray mold release (also at art stones)
!!!!!!!!!!!!!!!!!!!!!!!!!!!!!!The resin is very toxic BTW, read better instructions than these before u use it, ppl have even suggested respirators to avoid breathing the fumes, also doctors gloves r nice to just wear all the time, the resin comes off nothing.
-So, You take a cup you dont care about and put a piece of double stick tape at the bottom of the inside and then stick ur petite firmly down in the cup.
-spray the pony and inside of cup with mold release, let it dry
-mix the two part rubber mix thouroghly and pour over pony until shes covered at least by an 1/8"
-wait like a day
-wrestle the pony out. aided by heating the mold by putting it under the lamp
-spray a little more mold release in ur new pony mold, let it dry
-get ur resin, u can add glitter or anything without water in it, there r special dyes.. ive used even powdered charcoal to get black!
-add enough catalyst... im still not sure how much enough is, any where from 5 to 9 drops maybe?
-mix thouroghly, try to avoid bubbles
-pour in the mold.. any place where a toe or nose it under cut there will be a bubble, proper holding of the mold, ie sideways, nearly upside down 'can' get the bubbles out, but its the biggest problem with this project and some poses are especially almost impossible to cast properly.
-put the completely filled mold under a lamp or something and let it dry. at least 3 or 4 hours? until its hard i guess. if u touch it too soon u will leave a finger print. sometimes it will be dry but still sticky to the touch is some part of the process wasn't perfect... resin is kinda complicated, a good book to start with that i own is
here
Now, try to get the pony out, again easier if the mold is warm. And now u have a petite pony.
Big BTW, the resin smells absolutely horrible and is pretty toxic, and the materials u need cost $60+++ in all. You can of course have me make ur ponies for u, just send me a PM
They can be:
-clear/tranlucent
-opaque
-glittery
-glow in the dark
-TE/princess (gem stick in em somewhere)
I also have been making little charms out of the resin with pony pictures inside!
And I made sterling settings for them to ppl can have grown up pony jewelry!
There r definitely simpler ways to may such charms wearable, drilling a hold and buying some findings and stuff would make this project doable for ppl that have no experience metal smithing. the book i linked earlier has lots of projects that look pretty cool that aren't too complicated.
To make such a pony charm u need:
-resin and catalyst
-mold release
-store bought mold
-opaque white dye
-find ur favorite image on ur computer and print it small on clear sheets like for scrap booking, or overhead projectors
so:
-spray the mold w release
-mix up some resin and catalyst and fill the mold like half way
-stick under a heat lamp and allow it to dry like 15 mins
-cut out ur image carefully, mix up some resin and catalyst and put a few drops into the mold and lay ur picture on top, this helps keep air bubbles from getting under the picture then allow to dry some 15 mins again.
-now mix some opaque white w the resin and catalyze and pour no more than 1/8" on top of the stuff uv poured already-
-allow to dry under a lamp, it should pop right out when its done
a variation of this is a totally clear charm like in this necklace
oh, and all the charms need a bit of sanding usually, mostly on the backs.
Another project w less steps requires something to use as a base or bezel, i think u can buy such things at craft stores.
for this you need:
-some kind of bezel (mines made of sterling)
-resin and catalyst
-image printed out
-spray sealant
-glue
So, cut out the picture and seal it all over with the spray sealant and glue it to the bezel how you want it. they mix up a tiny bit of resin w lots of catalyst 8-15 drops, and fill up the tiny space on top of the picture, and let it dry under a lamp.
The one i did is actually very small, like 2cm across
So... ya. If anyone wants to actually try this stuff feel free to ask me any questions. If you wanna help fund my art addiction by buying some of the stuff I've made or custom order some jewelry or petites, please PM me!
Thanks for reading all the way to the end!
absol
Last edited: